elecworks图纸中同时显示三种语言描述的方法

工作中有时需要在图纸中同时显示两种或多种语言标注?

elecworks 默认可以同时显示三种语言标注  : 工程管理器->基本信息

Multilanguage option in electrical projects elecworks

符号标注中的内容关联三种语言,下面举例对应不同语言的变量:

Languages attributes in symbols elecworks

在设备对应变量中填入文本,显示出来结果如下:

Component languages in elecwtrical drawings elecworks

如果工作中需要图纸显示更多的语言,也是可以做到。下面的例子,每种语言对应的变量名称后面加入对应的代码就可以。最方便的方法就是复制已有变量,修改后缀的代码,就可以完成不同语言的显示。

Adding a new language attribute in the electrical symbol elecworks

如果需要手动翻译语言文本:处理->翻译中可以填入需要翻译成的文本:

Translation in elecworks

软件也可以自动导入翻译后的文本,支持xls, xlsx, mdb 和 sqlite格式

下面是不同语言对应的语言代码:


语言 代码 语言 代码 语言 代码 语言 代码
Afrikaans AF English EN Italian IT Serbian SR
Albanian AL Estonian ET Japanese JA 简体中文 ZH
Arabic AR Finnish FI Korean KO Slovak SK
Armenian AM French FR Latvian LV Slovene SO
Belarusian BE Georgian GE Lithuanian LT Spanish ES
Bulgarian BU German DE Norwegian NO Swedish SV
Catalan CA Greek EL Persian FA Thai TH
Croatian HR Hebrew HE Polish PL 繁体中文 ZH-TW
Czech CS Hungarian HU Portuguese PT Turkish TR
Danish DA Icelandic IC Romanian RO Ukrainian UK
Dutch NL Indonesian IN Russian RU Vietnamese VI

上面的方法可以举一反三,在不同符号的不同变量中都可以采用,可以多多尝试。


elecworks中BOM实现按字母排序的方法

下面图中的设备,如何在BOM中实现按字母顺序排列?

Step 0.1

Step 0.2

当你使用手动标注方式时,BOM报表中是按源和字母顺序排列。双击符号检查手动标注的规则,下面2个例子:

Step 0.3

Step 0.4

要实现按字母顺序排列,需要先修改为自动标注模式,定义源及标注序号,或点击右侧的符号调整序号,下面2个例子:

Step 0.5

Step 0.6

调整完成以后,再设定为手动标注模式,这样软件就不会在自动编号时把你的标注修改掉:

Step 0.7

Step 0.8

BOM报表中的结果预览:

Step 0.9

采用这种方法,可以实现elecworks BOM中按字母顺序排列的方式。

提示: 适用 elecworks 2016 SP3以后的版本


elecworks如何批量设置标注为手动模式


目标

当工程已经完成和生产后,工程文档需要设置为“已完成”,以避免设备标注被再次自动更新修改。

背景介绍

“已完成”工程的标注不可以随意被自动改变,因此标注需要设置为手动模式。

相关的标注包括:

  • 电位/电线 标注
  • 设备标注
  • 电缆标注
  • 端子标注
  • ….

当前,最方便的做法是通过elecworks界面,打开每个元素的属性,设置标注方式为手动模式。

操作过程

现在新增了一个功能,第一步是导出数据到Excel。

Export data excel elecworks

所使用的模板是allobjects.xls。

Excel template elecworks

创建的表格包含工程中已有的信息。

Spreadsheet elecworks project

本篇技巧的目的,是设置每一页的数据为手动模式,也就是设置所有行的值为 “1” 。

Changing manual mark field elecworks

注意: excel文件中的说明或标注内容也可以被更改,并更新到工程中。

所有的更改完成后,最后一步是导入表格内容到工程中。

Import back elecworks project

对于每个元素类型来说,导入数据之前将会显示改变内容的提示。

Tab shown changes elecworks

完成检查所有数据后,导入过程完成。现在,所有的标注成为手动模式。

Cable tab marks in manual elecworks
Manual marks setting elecworks

总结

导入/导出 XLS 是elecworks的强势功能之一,但这样强大的功能却鲜为人知。本篇只是介绍了众多实例之一,自动切换手动标注模式。这样的方式节约时间,避免工程校验时可能出现的错误。
同时,该功能也可以用于更改说明、用户数据、标注,等操作方法相同。

elecworks自定义快捷键

elecworks 可以自定义快捷键!

操作过程如下

单击自定义快速访问工具栏:

Customize Toolbar in elecworks


选择更多命令:

More Commands in elecworks


选择键盘:

Keyboard Tab in elecworks


当前打开的菜单的类别中列出了 elecworks 可用菜单:

Category List in elecworks

Toolbar in elecworks

注意: 如果需要不同的菜单,则需要先打开菜单。例如如果需要原理图菜单,则需要打开原理图。

选择分类和命令,例如:

Customizing Commands in elecworks

填写请按新热键,例如:

New shortcut key in elecworks

单击分派:

Assign new shortcut key in elecworks

这样就可以使用 Ctrl+1 执行添加电线的命令。

优势

自定义快捷键可以让 elecworks 操作更便捷!

Project creation using a previous bill of materials – elecworks tips and tricks


There are some projects where the initial data is a Bill of Material. For that elecworks has the “Import Data” feature, which enables to obtain directly the “Components tree” of your project in an easy, quick and simple way.

Project created from bill of materials bom elecworks

Description

Note: If your BOM has descriptions in more than one language, it is necessary to configure these languages in your project (3 maximum) before to start the “Import data” process.

Project language configuration elecworks

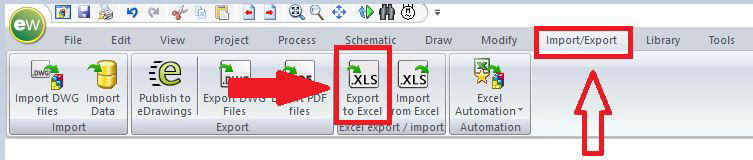
To create the “component tree” of an elecworks project using and initial BOM (in “*.xls”) you have to use the “Import Data” option from elecworks’ “Import/Export” menu.

Import data menu elecworks

By selecting this option, you go through the following steps.
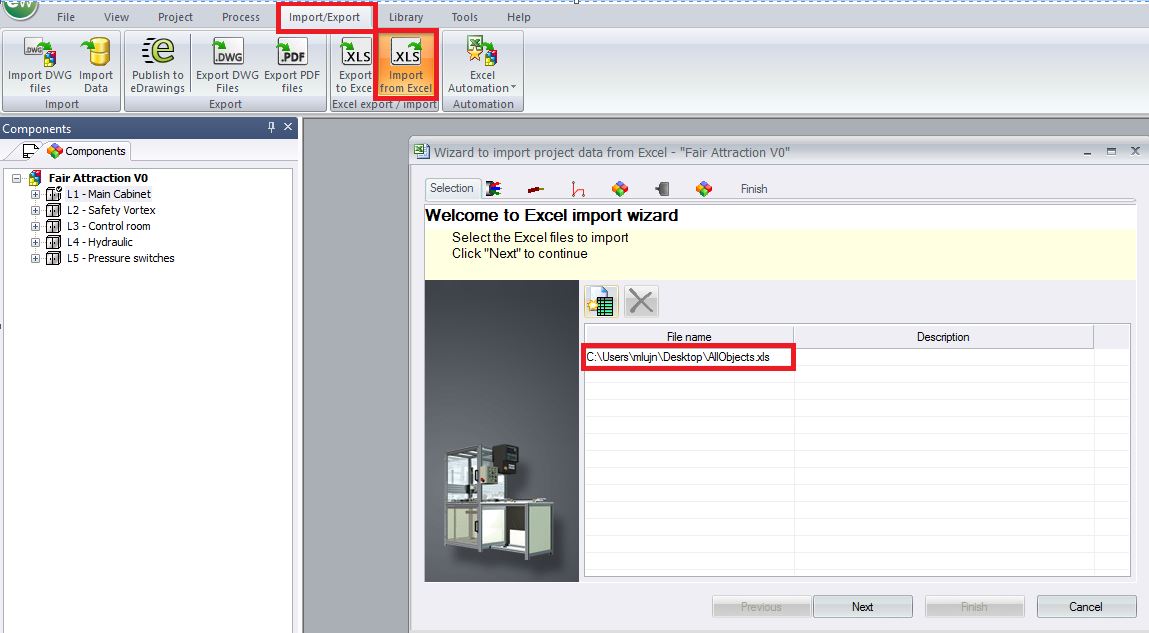
Start by selecting the data source. Simply click on the BOM file in “*.xls” or “*.txt”, and then hit Open.

Select bill of materials elecworks

Select data source elecworks

Next you have to define the data range and the data type to be imported into the project. For this, select the “component” type and the Excel sheet where the Bill of Material data is located.

Definition data range elecworks

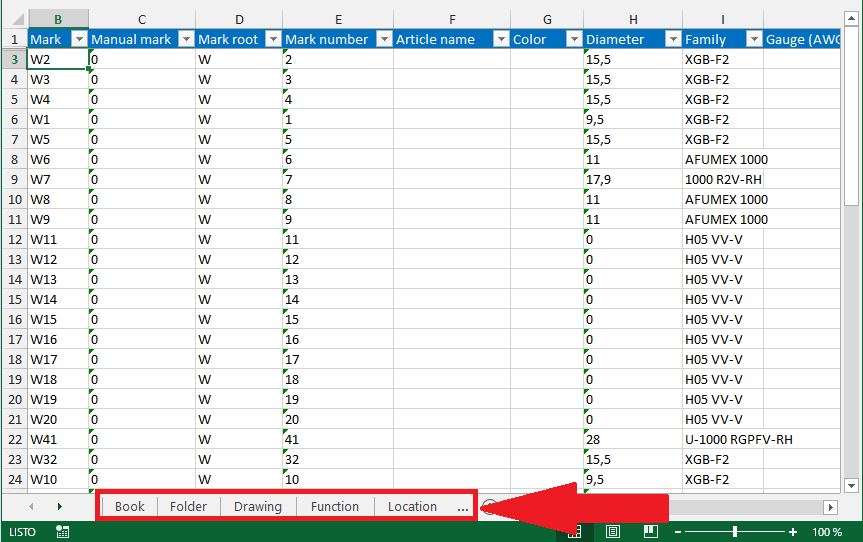
Then, it is necessary to mark the title row as the header of the columns, of this materials list.

In addition, the fields’ mapping will be required. In this dialog box the correlation between BOM’s columns and the elecworks’ components fields will be established. Nothing is simpler, just select the correct component’s field, drag it from the left hand side list and drop in the correct BOM’s column, on your right hand side. The assignment between elecworks components and the BOM’s columns will be seen in the object and field rows. Don’t worry if you go wrong in selecting the column, just start the selection of the field again.

Component field elecworks

It is necessary to remark that, by default, the component description corresponds to the . You need to use this component field for each description by selecting the correct language in the drop-down menu.

Component description elecworks

If you have configured the languages correctly, you will have the option to select the correct language for each component description, during the drag and drop operation, to make the association.

Selection language description elecworks

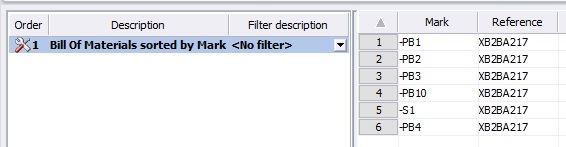
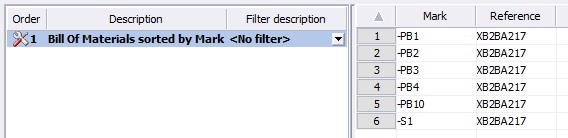
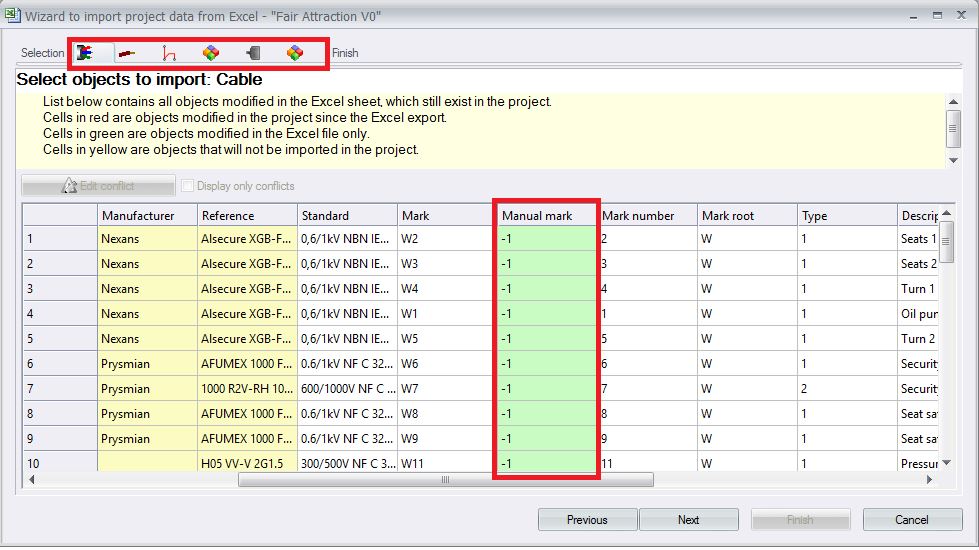
After this mapping process, in the next dialog box, you have to run a check on the data to be imported, by clicking on “Compare” button. This process produces a *.txt file where you can see the number of the components which will be added in the project’s component tree and all the component tags and their descriptions.

Data comparison elecworks

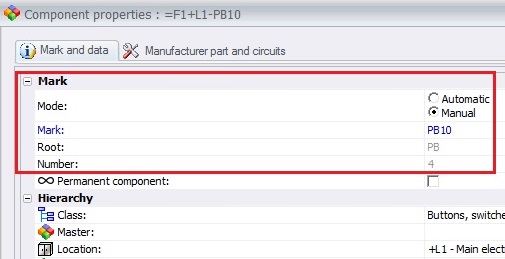
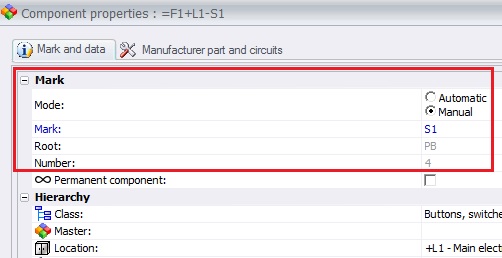
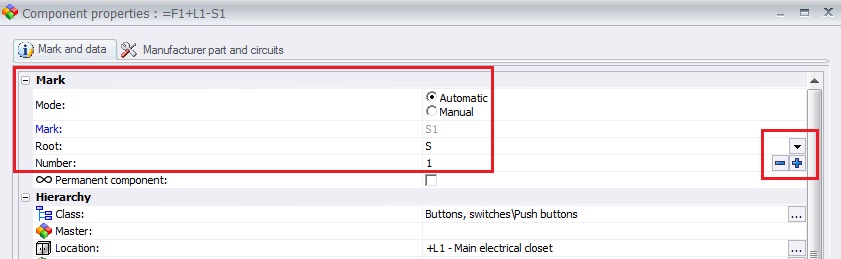
Note: If you include manufacturer and reference information in the import process be sure that the information in the excel file matches with the information in elecworks library.
If not, the references will be created only at project level and without the library properties. In addition you have the risk of add “new” references when you edit them at component level.

To finish the import process, select the “Import” option. Then, the components will appear automatically in your project components tree with their tags and descriptions in the corresponding languages.

Components inserted automatically elecworks

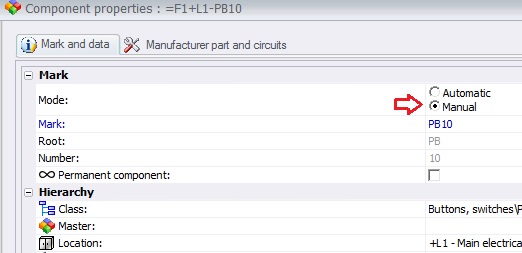
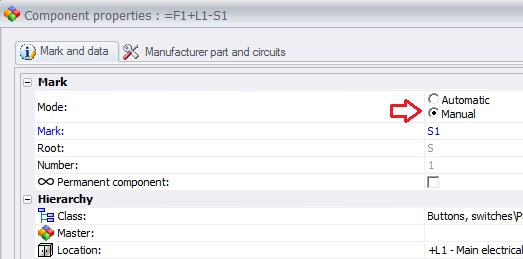
Note: The components will be placed in the default location and default function of the project.

You can then multiple select the relevant components and change their location &/or function as necessary.

If you need a personalized project structure, with the components placed directly in the correct location and in the correct function, the import excel file can be prepared with separate sheets, one for functions, second for locations and a third for components. For this you need to start with the mapping of functions and locations first and then, do the mapping for components, in the same import process.

Import location & function elecworksComponents association location & function elecworks

After mapping the functions’ fields, “Add a data range” to import the locations and then the components in the same import data process.

New data range elecworks

And you have to do the same process before selecting the rest of the sheets of the excel file.

Select components functions elecworks

So you will have the components’ location and function as columns in the right hand side as seen below.

Components functions locations elecworks

Now, you “Compare” and then “Import”.
The result will be your project tree with the required project structure.
For example (highlighted in yellow color below):
=L1-F2+M02
Motor M02 is performing the function F2 and is placed in the location L1.

Component tree complete elecworks

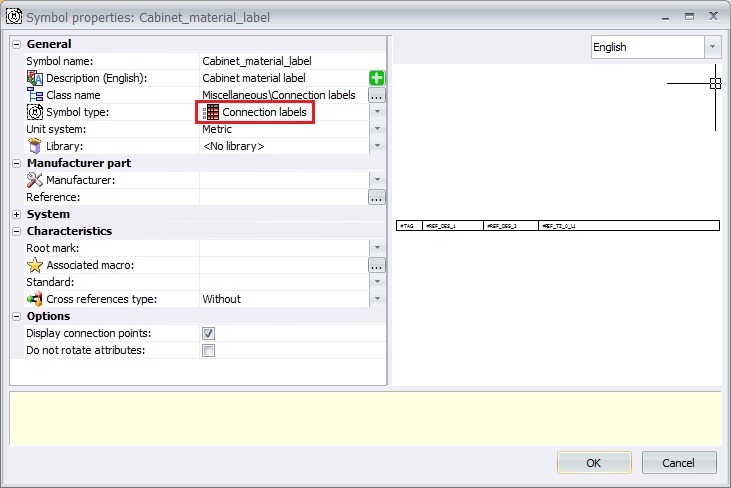
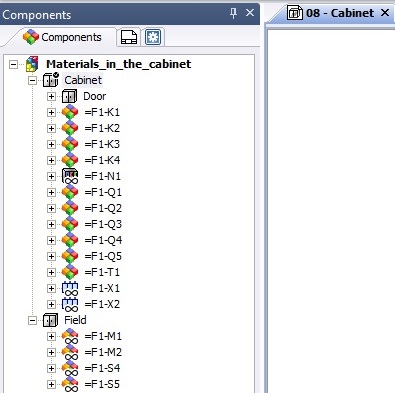
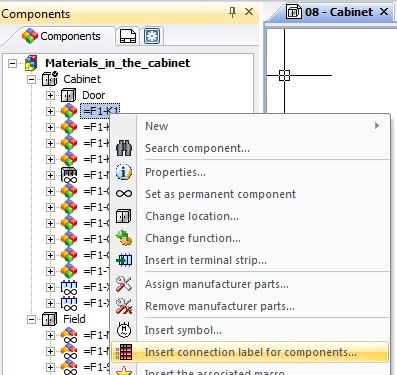
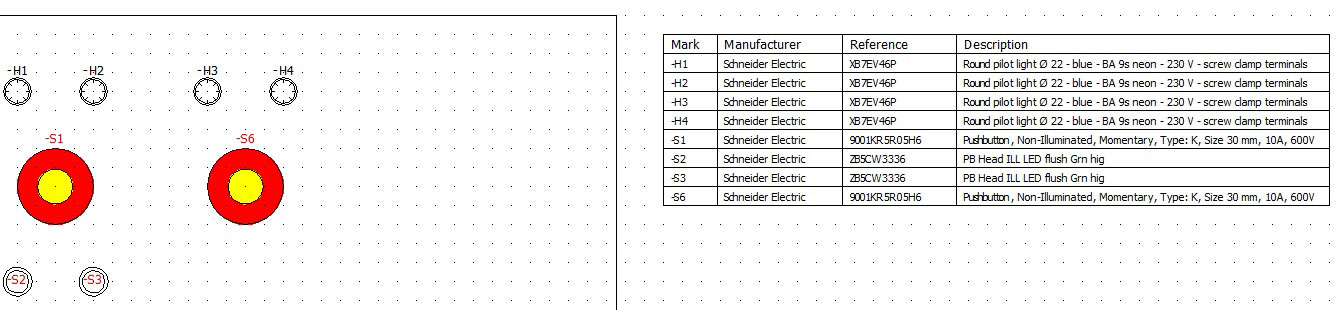
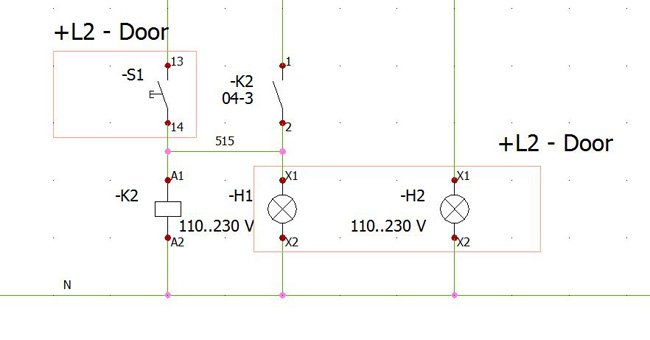
With the components tree created, you can create all the reports that you need, assign manufacturer parts references from your libraries and insert the components in a drawing as symbols, by using a right click on a component and then selecting the option “insert symbol”.

Insert symbol schematic drawing elecworks

Conclusion

If you use this simple feature to start your projects, you can reduce the number of errors in your project. You will make your projects faster, improve your design efficiency and increase your ROI benefits.


elecworks自定义图框

在elecworks中自定义的模板通常会在图框中使用企业的logo。

操作过程

添加图框副本

非常推荐编辑图框的副本而不是直接修改图框本身,这样可以避免更改原始图框。

在工程中,右击页面后从关联菜单中使用添加至库,并对副本更改名称。
 Adding the title block to the library in elecworks
 Creating a new title block in elecworks

Customize the name, description, and class of your title block.
 Customizing the title block in elecworks
然后,从图框编辑器中编辑图框。

插入logo

通过插入图片命令,讲图片插入至图框。图片插入elecworks前,最好是在画图中打开。
 Logo insertion in the title block in elecworks ==> Insert image command in elecworks


 Logo insertion window in elecworks
 Customized title block in elecworks
如果图片没有在画图中打开,则将会是下图的结果,显示图片名称。
 How to solve image problem in title block in elecworks

替换图框

对页面的图框做替换。

 Customized title block insertion into elecworks projects

优势

这个方法可以自定义图框样式,添加企业的logo,且图片的格式不受限制。

elecworks页面中插入设备清单

是否希望在机柜布局图中添加制造信息?
elecworks 可以帮助你完成!

操作过程

1) 创建接线图,添加制造信息属性。进入 数据库>符号管理器, 选择分类 其他\接线图 创建新符号命名为Cabinet_material_label:

 elecworks connection labels attribute

符号类型 设置为 接线图 ,如下图定义符号:

elecworks symbol type connection label
• 注意: 使用左上角的位置定义为插入点。

如果需要,可以对符号添加表头:

elecworks symbol copy with header

2) 在机柜布局图中插入接线图 ,选择接线图浏览器

elecworks connection labels insertion

选中所有需要批量插入的设备,右击,选择插入设备的多个接线图符号:

elecworks insert connection label for components

选择其他符号按钮,插入带表头的接线图:

elecworks Other symbol connection label

重复操作,使用不带表头的接线图:

elecworks connection label table

同样,你也可以添加门上的设备:

elecworks door components table

优势

elecworks 可以生成更多的信息,完成机柜布局图的文档。使用这样的方式,你可以创建更高质量的工程文档!

elecworks优化接线方向

背景介绍

在设计机柜的行业中,通常工人接线所看的是接线图或者接线表,而不是原理图,在一些大的项目中尤为如此。所以报表在统计时就需要根据设备连接的位置做排序。

仍然有很多的企业在使用手工排序的方式制作表格。但是在elecworks中,工程师可以使用更高级的智能工具来对不同位置的接线做优化处理。


操作过程

对于以下的原理图来说,有两个不同的位置。

Part of an electrical scheme
在完成绘制后,默认的接线顺序是这样的:
How to optimize the cabling order


从图中就可以看出,从柜体到Door之间需要两根电缆,分别是

+L2-S1:14 – +L1-K2:A1 和 +L1-K2:2 – +L2-H1:X1。

但是实际上我们只需要一根电缆,然后在另一个位置里面再连接电线就可以了。

这时,可以使用elecworks的“优化接线方向”功能。
Optimize wire cabling order menu


新的接线关系产生了。
Equipotential optimized with wire cabling order optimization command

这样的接线方式,只需要+L1-K2:A1 – +L2-H2:X1这一根电缆就可以了,其他的都是柜体内部的电线接线了。


优势

这样的方法可以帮助企业实现:

  • 节约时间,自动完成接线优化
  • 完成优化后自动生成报表
  • 优化接线,节约成本
  • 提高生产效率


elecworks Viewer浏览工具

elecworks 2014起, Trace Software推出了面向电气CAD的全新解决方案 elecworks™ Viewer, elecworks的高级浏览器。

elecworks™ Viewer,可以在开发阶段帮助不同的角色,例如研发经理,采购,技术支持等,在工程设计的任何阶段查看开发进度。

elecworks™ Viewer用于查看和打印页面,输出报表,也适用于elecworks™ 的其他方案,例如elecworks™ Onboard, elecworks™ P&ID, elecworks™ Fluid 以及 elecworks™ Facility

elecworks™ Viewer是一个协同设计平台,也可以使用消息模式进行工程进度的沟通。

elecworks™ Viewer的操作者可以进入文件结构树,预览页面的缩略图,和预览选定的页面。

elecworks™ Viewer to view electrical projects


工程内的导航依然可以在文件结构树和设备结构树中使用。

查找命令,可以方便的快速筛选各种所需数据(例如:标注,位置,设备型号,设备类型等)

elecworks™ Viewer Filter menu


替换命令可以导入xls 或 txt ,页面也可以导出到DWG或带导航功能的 PDF。

elecworks™ Viewer to print, export to DWG or PDF navigable drawings


elecworks使用方框图自动分配电缆芯接线

关联电缆芯是一个庞大的工作量。

elecworks terminal drawings

一般来说,电缆芯的分配是在端子编辑器或原理图中完成。

本篇将会介绍如何自动完成电缆芯的分配。

过程

方框图可以实现自动关联,操作过程可以是在原理设计前或后。

本篇中,只是放置了需要布线的设备。

elecworks single line diagram

双击电缆,显示详细布线,elecworks显示自动连接的所有数据。

elecworks cable wiring

接下来,添加电缆。

elecworks cable manager

点击关联。

elecworks cable associate

elecworks自动关联电缆芯到每个连接上。

elecworks cable core

原理图中,每根芯也完成了接线。

elecworks electrical schemes cable core

优势

使用该方法,使用者可以节约大量布线时间,避免错误。

此外,使用者可以设计方框图。

elecworks cable synoptic drawing